Change Your IP in One Click Without Replacing Proxies
We continue improving the platform and making proxy management easier. In this update, we introduced a quick IP change feature through a dedicated URL that is automatically generated for every proxy connection string.
Now you no longer need to create new proxies, edit browser profiles, or manually update connection settings every time you need a new IP address.
Below, we’ll explain how it works.
An IP Change URL for Every Proxy Connection
Every proxy connection string now comes with a dedicated IP change URL.
To use the feature, simply:
- add the proxy connection string to your antidetect browser
- add the IP change URL to the appropriate browser field
- save your profile settings
After that, a quick IP change button will become available directly inside your antidetect browser.
Benefits
The new feature allows you to:
- change IPs with a single click
- avoid creating new proxies when a new IP is needed
- eliminate manual profile editing
- recover faster from connection issues
- save time when managing multiple accounts
If a proxy becomes slow or stops responding, simply click the IP change button in your antidetect browser. A new IP address will be assigned automatically.
Support for Popular Antidetect Browsers
The feature works through a standard IP rotation mechanism supported by many antidetect browsers.
You only need to add:
- the proxy connection string
- the IP change URL
Once configured, IP rotation can be performed directly from the browser interface without any additional actions in the MangoProxy dashboard.
How to Set It Up
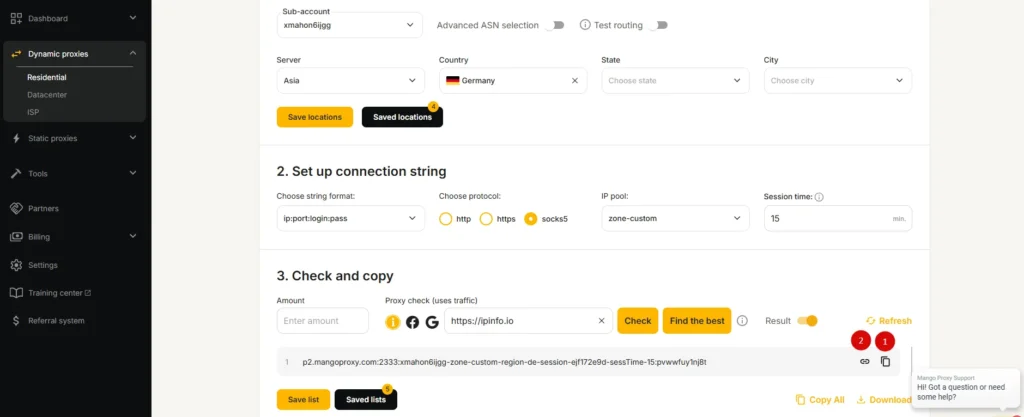
Step 1. Copy the Proxy Connection String and IP Change URL
In the proxy settings section, you will now see two values:
- proxy connection string
- IP change URL
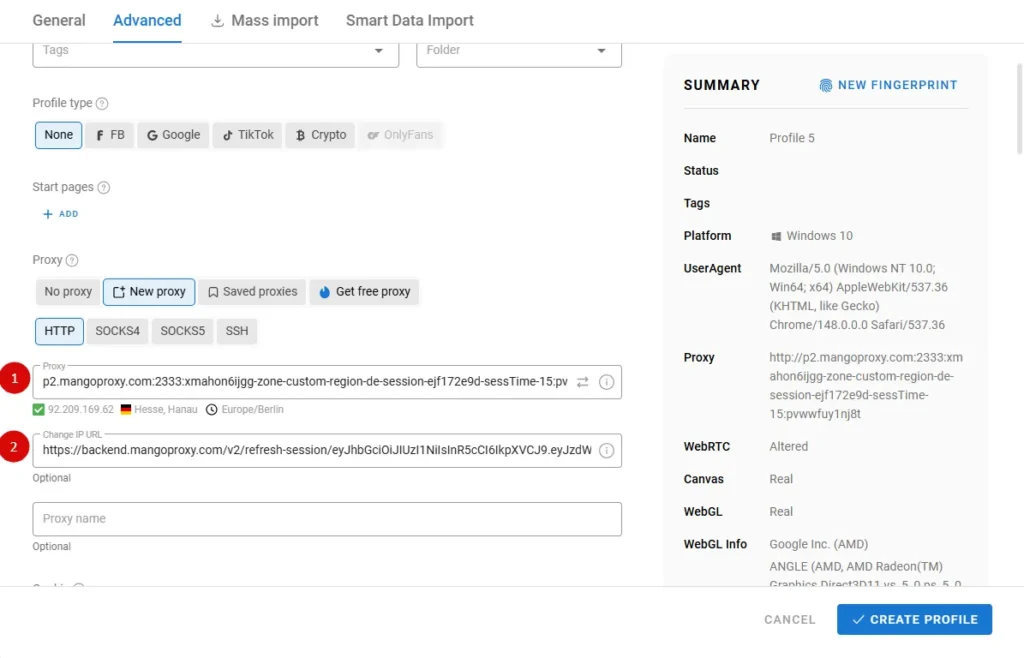
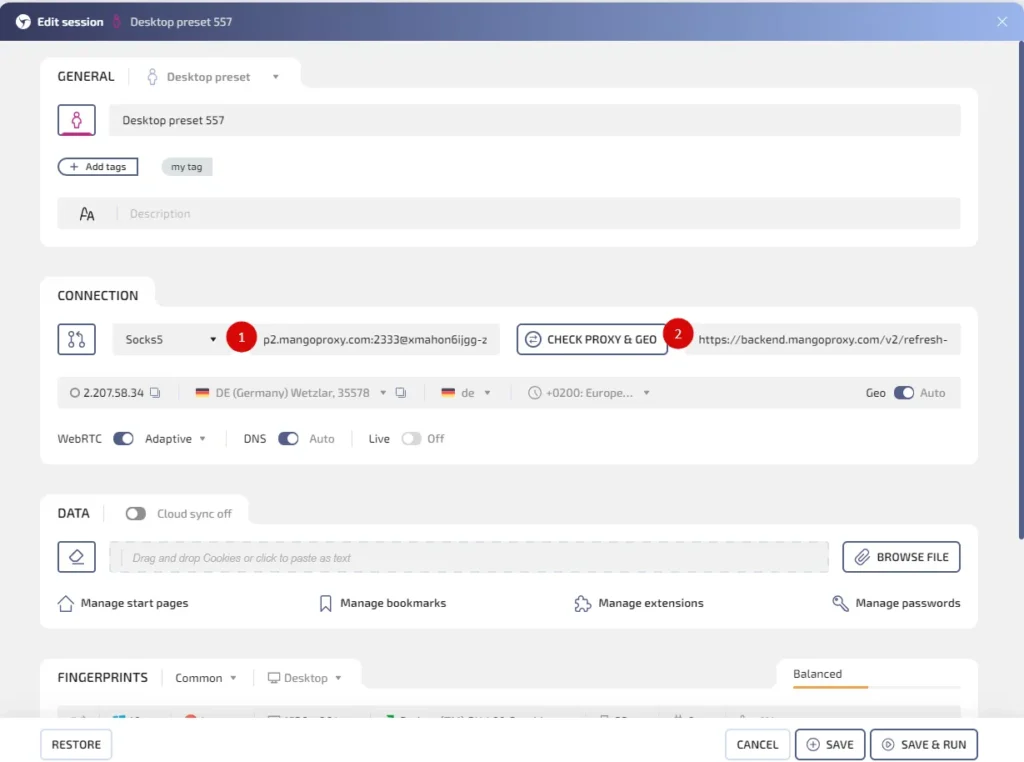
Step 2. Add the Data to Your Antidetect Browser
In your browser’s proxy settings, enter:
- the connection string in the Proxy field
- the IP change URL in the Change IP URL field
Step 3. Save the Profile and Verify the Connection
After saving the profile, the antidetect browser will be able to use the proxy and rotate IPs through the provided URL.
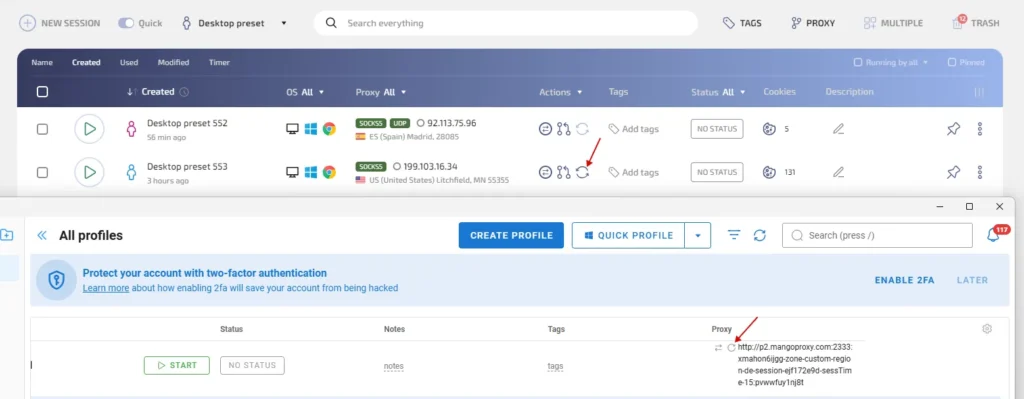
Step 4. Change IPs with One Click
Once the profile is configured, an IP change button will become available directly inside the browser interface.
If the proxy becomes slow or you simply need a fresh IP address, click the refresh button and a new IP will be assigned automatically.
What This Changes
This update removes unnecessary steps from proxy management. Instead of creating new connections and manually editing profiles, you can now get a new IP address with a single click.
The feature is especially useful for users working with multiple accounts, automation tools, and antidetect browsers.

Frequently asked questions
Here we answered the most frequently asked questions.
Do I need to create a new proxy to change my IP?
No. Simply use the IP change URL that is generated together with your proxy connection string.
Where can I find the IP change URL?
It is displayed in your MangoProxy dashboard alongside the proxy connection string.
Which browsers support this feature?
Any antidetect browser that supports a Change IP URL field or a similar IP rotation mechanism.
Do I need to edit my profile settings after changing the IP?
No. Once the profile is configured, IP changes can be performed with a single click without modifying the profile settings.
Nice update. The ability to change an IP with a single click saves a lot of time compared to manually updating proxy settings every time.