
How to Set Up a Proxy in Afina: Step-by-Step Guide

Working with Proxies in Afina
Afina is a browser designed for managing multiple accounts, allowing you to create isolated environments with individual browser, device, and network settings. Each account stores its own configuration, enabling different projects to run independently without sharing data.
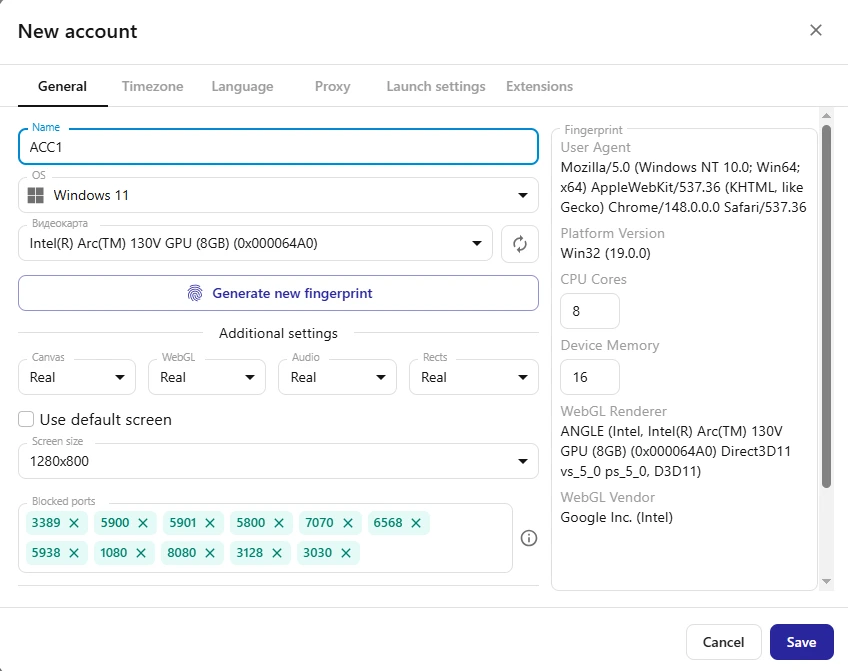
When creating a new account, you can choose the operating system, generate a browser fingerprint, configure the language, time zone, and other environment settings. One of the most important configuration steps is adding a proxy, since it determines the external IP address that the account will use.
Besides assigning a proxy during account creation, Afina also lets you store all your proxy connections in a dedicated Proxies section. This makes it easy to reuse existing proxies for new accounts without entering the connection details again.
Why Use Proxies in Afina
When working with multiple accounts, it’s important to separate not only browser settings but also network connections. Using the same IP address for different accounts may allow websites to associate them with one another.
Using proxies in Afina allows you to:
- assign a separate IP address to each account;
- connect through different countries and regions;
- isolate projects from one another;
- keep all proxy connections in one place;
- quickly assign saved proxies to new accounts.
Afina supports HTTP, HTTPS, and SOCKS5 protocols, making it compatible with most modern proxy providers.
If you’re new to proxies and would like to understand how they work, we recommend reading our guide:
Setting Up a Proxy in Afina
Step 1. Create a New Account
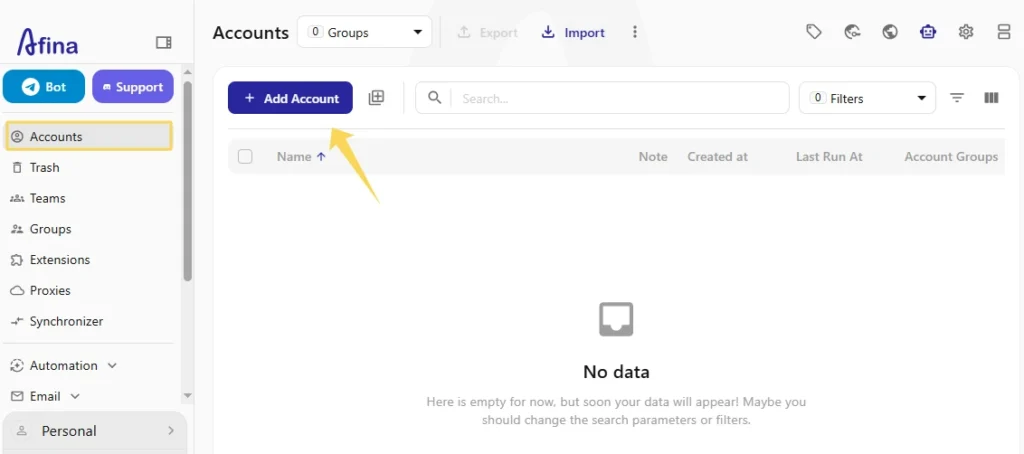
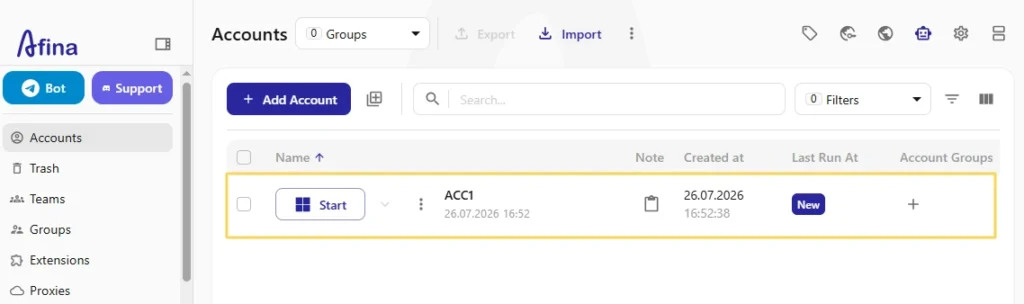
Launch Afina, open the Accounts section, and click Add Account.
This will open the account creation window.
Step 2. Open the Proxy Tab
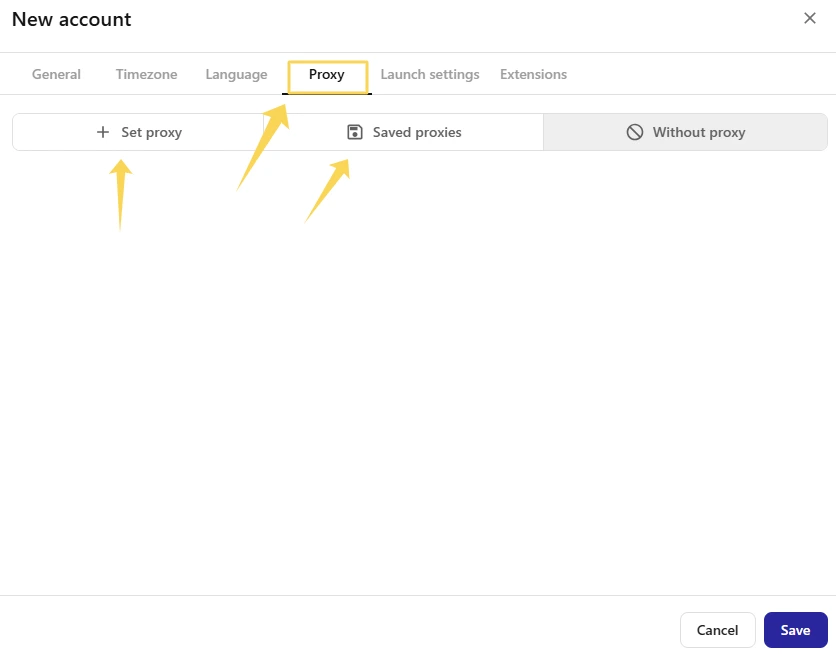
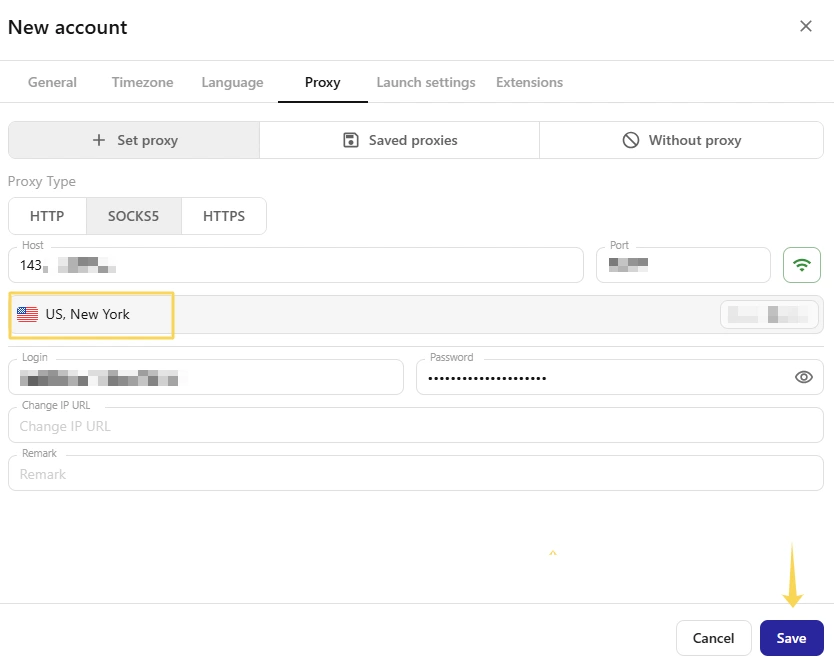
In the account creation window, select the Proxy tab.
You’ll see three available options:
- Set proxy – add a new proxy;
- Saved proxies – select a previously saved proxy;
- Without proxy – use the account without a proxy.
To configure a new connection, choose Set proxy.
Step 3. Select the Proxy Type
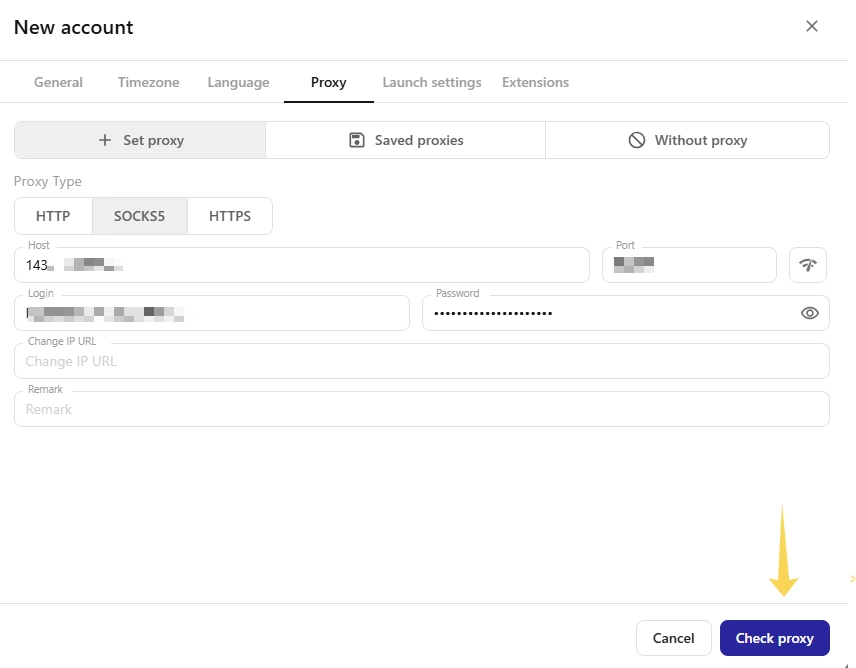
Under Proxy Type, choose the protocol provided by your proxy service.
Afina supports:
- HTTP;
- HTTPS;
- SOCKS5.
Make sure you select the protocol that matches your proxy credentials.
Step 4. Enter the Proxy Details
Fill in the following information:
- Host;
- Port;
- Login;
- Password.
You can also specify:
- Change IP URL – if your provider supports IP rotation via a URL;
- Remark – an optional note for easier identification.
Step 5. Test the Connection
After entering the connection details, click Check proxy.
If the connection is successful, Afina will detect the proxy location and display information such as the country and city.
This allows you to verify that the correct IP address is being used.
Step 6. Save the Settings
Once the proxy has been successfully tested, click Save.
The proxy will be assigned to the account and used when it is launched.
Managing Saved Proxies
Afina allows you to build your own proxy library and reuse saved connections when creating new accounts.
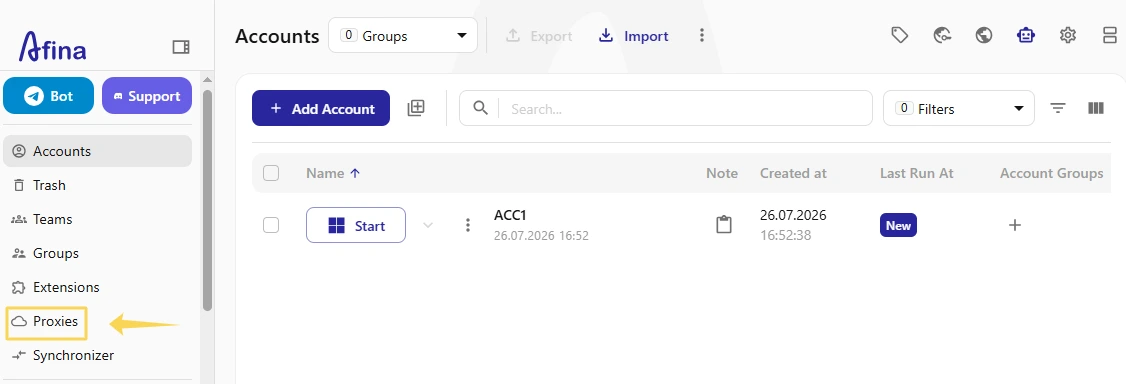
To do this, open the Proxies section from the left sidebar.
Step 7. Add a New Proxy
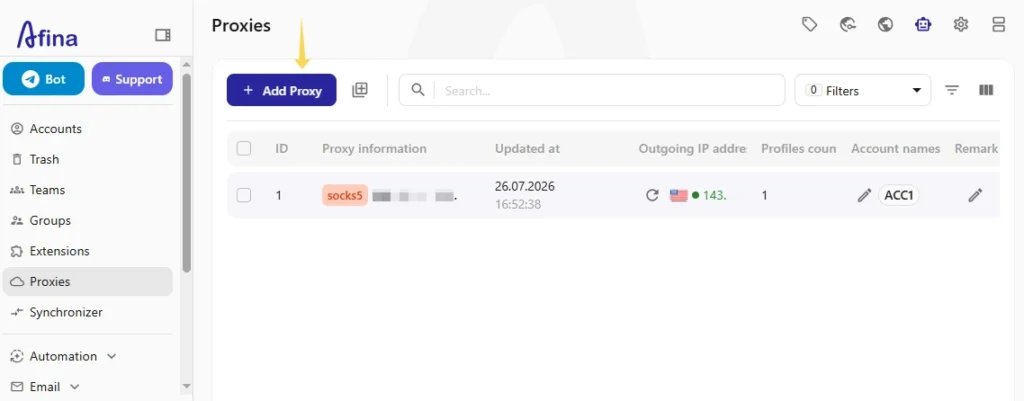
Click Add Proxy.
The proxy configuration window will appear.
Fill in the following fields:
- proxy type;
- Host;
- Port;
- Login;
- Password;
- Change IP URL (optional);
- Remark (optional).
Then click Add Proxy.
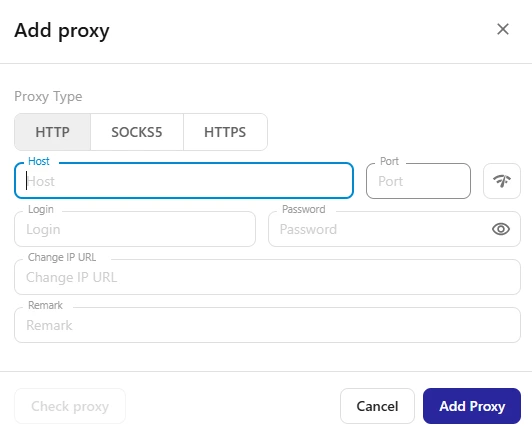
The new proxy will be added to the list and become available under Saved proxies when creating future accounts.
Additional Connection Check
After saving the proxy, it’s recommended to perform an additional check to make sure your connection works correctly and that your external IP is detected properly.
You can use the following free MangoProxy tools:
👉 IP Lookup – Check your IP address and GEO
👉 Proxy Checker – Verify proxy connectivity
👉 DNS Leak Test – Check DNS, WebRTC, and IPv6 leaks
👉 Port Scanner – Check open ports
Which Proxies Are Best for Afina?
The right proxy type depends on how your accounts are used and the tasks you perform.
- Residential proxies are commonly used when you need IP addresses that belong to real home internet users.
- ISP proxies are a good choice for long-term account management thanks to their stable connections and trusted IP reputation.
- Datacenter proxies are ideal for automation, monitoring, and other tasks where speed and performance are the priority.
- Mobile proxies are suitable for scenarios that require connections through mobile carrier networks.
To learn more about the differences between these proxy types, check out our guide:
👉 Residential vs. ISP vs. Datacenter vs. Mobile Proxies: What’s the Difference?
Afina Features
Some of Afina’s key features include:
- creating isolated accounts with independent settings;
- support for HTTP, HTTPS, and SOCKS5 proxies;
- storing proxies in a dedicated section;
- quickly assigning saved proxies to new accounts;
- built-in proxy verification before saving;
- browser fingerprint generation;
- browser and device configuration;
- account, team, and group management.

Frequently asked questions
Here we answered the most frequently asked questions.
Can I create an account without using a proxy?
Yes. The Without proxy option on the Proxy tab allows you to use your computer’s regular internet connection.
Is it better to add a proxy directly to an account or save it separately?
Can I change the proxy after creating an account?
Yes. You can update the proxy settings at any time, and the account will use the new connection the next time it is launched.
What is the Change IP URL field used for?
If your proxy provider supports IP rotation via a dedicated URL, you can enter it in this field. This allows you to refresh the IP address without changing the rest of the proxy configuration.
Should every account have its own proxy?
It’s not a strict requirement, but assigning a separate IP address to each account is generally recommended. This provides better isolation between accounts and reduces the chance of them being linked together.