How to Set Up Proxies in AEZAKMI

AEZAKMI is an anti-detect browser designed for creating isolated browser profiles for multi-accounting, automation, and working with various online platforms. However, proper profile isolation involves more than browser fingerprints alone – network settings also play an important role.
Using dedicated proxies allows you to assign a unique IP address to each profile and reduce overlaps between accounts. This is especially important when working with advertising platforms, social networks, marketplaces, and other services that analyze network-related signals.
In this guide, we’ll look at two ways to configure proxies in AEZAKMI and show how to quickly assign an IP address to a new profile.
Why Use Proxies in AEZAKMI
When managing multiple accounts, the browser profile and IP address together form a user’s environment. If several profiles share the same connection, platforms may detect links between them.
Proxies help create separate network environments for each profile and allow you to:
- use different geolocations
- distribute accounts across multiple IPs
- reduce the number of security checks
- work with multiple platforms simultaneously
- run automation with fewer restrictions
If you’d like to learn more about how proxies work, we recommend reading:
Setting Up a Proxy in AEZAKMI
Step 1. Create a Profile
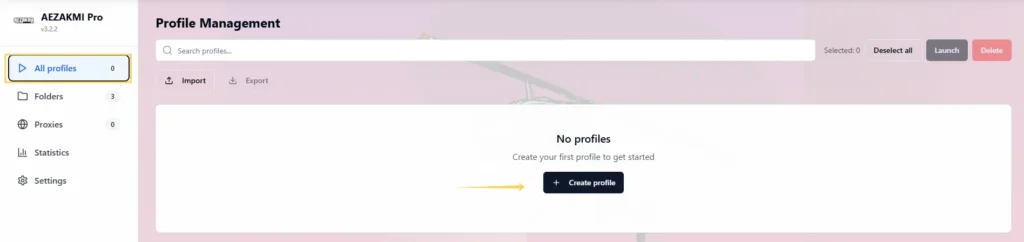
Open the All Profiles section and click Create Profile.

A profile creation window will appear. On the Basic tab, enter a profile name, choose a folder if needed, and add notes.
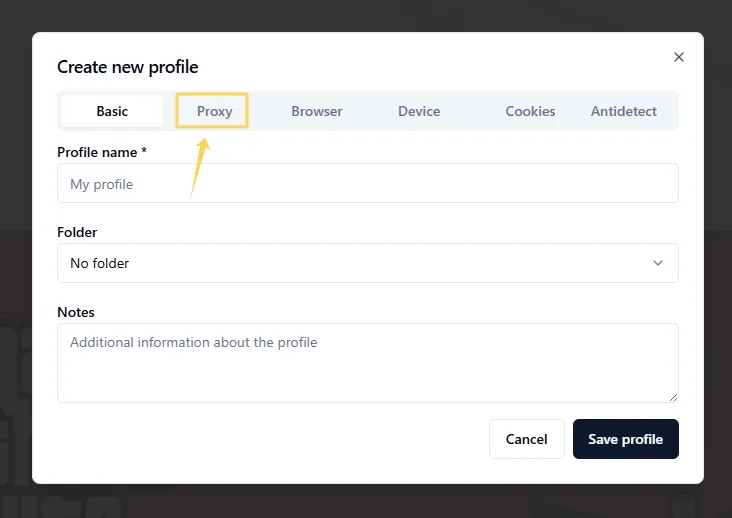
Then switch to the Proxy tab.
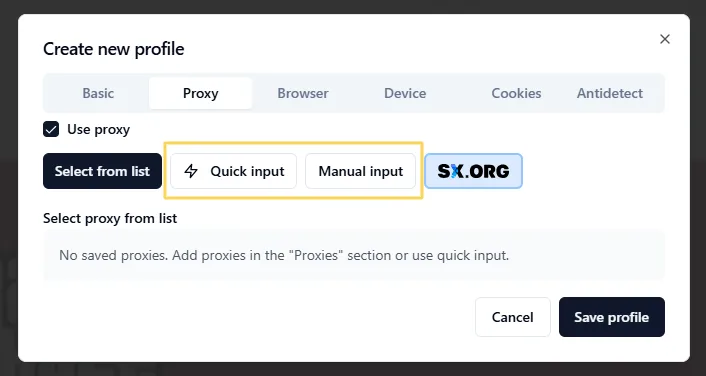
Step 2. Configure the Proxy
AEZAKMI supports two proxy setup methods:
- Quick Input
- Manual Input
Method 1. Quick Input
Quick Input allows you to add a proxy using a single line without manually filling out every field.
Open the Quick Input tab and paste your proxy information in one of the supported formats.
For example:
socks5://username:password@host:port
or
host:port:username:password
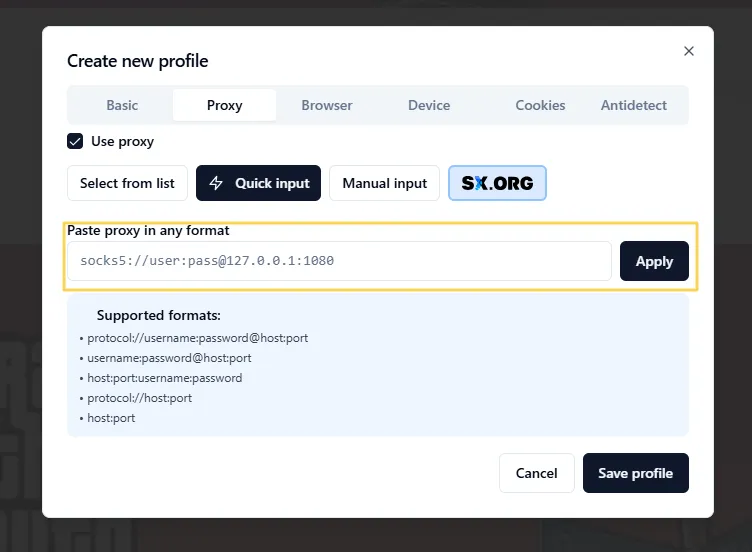
AEZAKMI will automatically recognize the connection details and populate the required fields.
After pasting the proxy, click Apply, then save the profile using Save Profile.
Method 2. Manual Input
If you prefer manual configuration, open the Manual Input tab.
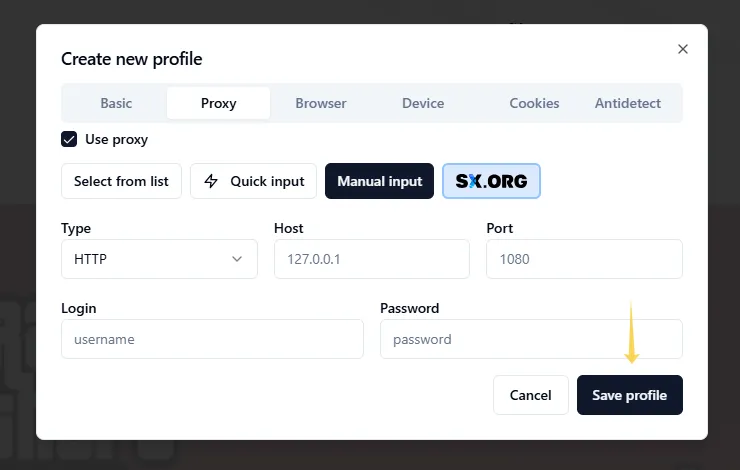
Specify:
- proxy type (HTTP, HTTPS, SOCKS4, or SOCKS5)
- IP address or domain
- port
- username
- password
Once all information has been entered, click Save Profile.
This option is useful when you need to verify settings manually or use a custom proxy configuration.
Step 3. Launch the Profile
After saving, the profile will appear in the All Profiles list.
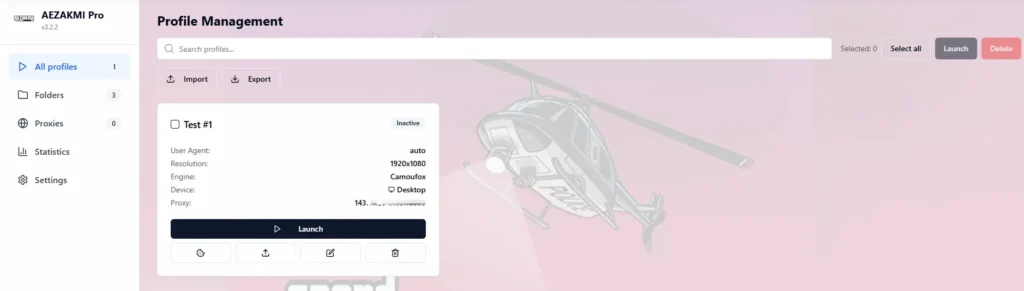
Make sure the assigned proxy is displayed next to the profile, then start the browser session by clicking Launch.
Step 4. Manage Proxies Through the Proxies Section
If you plan to use the same proxies across multiple profiles, it is more convenient to add them first through the Proxies section.
Open Proxies from the left-hand menu and click Add Proxy.
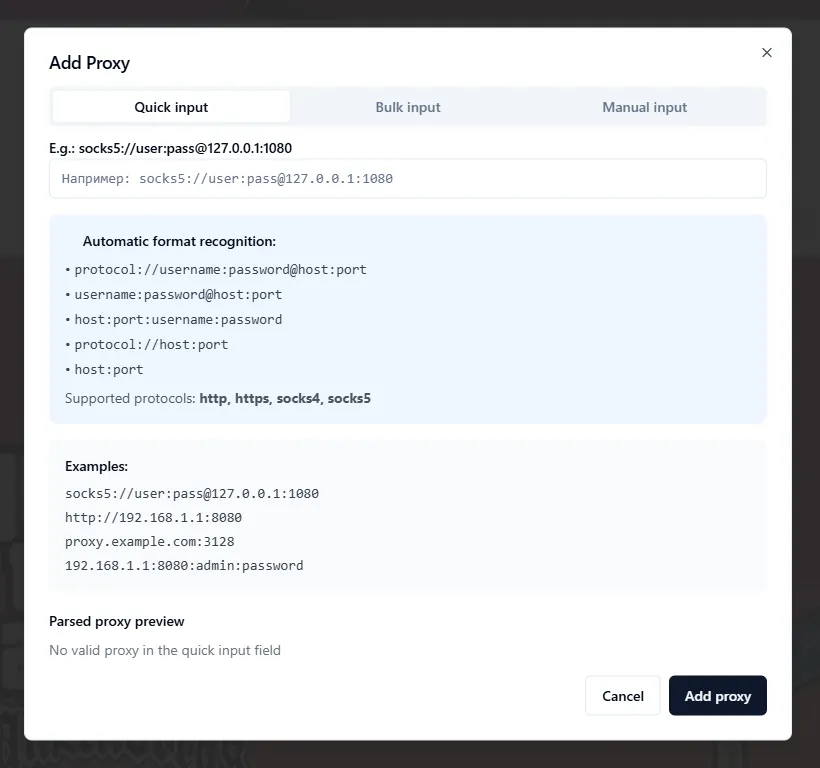
The following import options are available:
- Quick Input – add a proxy using a single line
- Bulk Input – import multiple proxies at once
- Manual Input – manually enter connection details
For quick setup, simply paste your proxy in one of the supported formats, such as:
socks5://username:password@host:port
or
host:port:username:password
AEZAKMI will automatically detect the connection format and fill in the required settings. Then click Add Proxy.
Saved proxies will appear in the list and can be selected when creating new profiles. This approach is particularly useful when working with large numbers of accounts and provides centralized proxy management.
Checking Network Settings
Before getting started, it is recommended to verify that your IP address is detected correctly and matches the intended location.
You can use the following tools:
👉 Check your current IP address: IP Lookup
👉 Test proxy functionality: Proxy Checker
👉 Analyze the connection route: IP Trace
Best Proxy Types for AEZAKMI Browser
| Task | Recommended Proxy Type |
| Social media accounts | Residential |
| Affiliate marketing | ISP or Residential |
| Advertising accounts | ISP |
| Automation | Datacenter |
| High-risk platforms | Mobile |
If you’re unsure which proxy type fits your needs, we recommend reading:
👉 Residential vs Datacenter vs ISP Proxies
Common Use Cases for AEZAKMI Browser
AEZAKMI Browser is frequently used for:
- multi-account management
- advertising account operations
- affiliate marketing
- automation workflows
- marketplace management
- web service testing
You may also find these guides useful:
What to Do If a Proxy Isn’t Working
The profile won’t launch
Check that the proxy format and credentials are correct.
The location is detected incorrectly
Make sure the selected proxy belongs to the intended region.
Websites load slowly
Try another server or switch to a different proxy type.
Additional verification requests appear
Use higher-quality IP addresses and avoid excessive activity.
Best Practices
For more reliable operation in AEZAKMI, we recommend:
- using a separate proxy for each profile
- avoiding GEO changes during active sessions
- separating work and testing accounts
- checking IP quality before launch
- monitoring proxy status regularly

Frequently asked questions
Here we answered the most frequently asked questions.
Can I use Quick Input instead of manual setup?
Yes. Quick Input automatically recognizes most popular proxy formats.
Which protocols does AEZAKMI Browser support?
HTTP, HTTPS, SOCKS4, and SOCKS5.
Are rotating proxies supported?
Yes. AEZAKMI supports proxies with IP rotation.
Should I use a separate proxy for each profile?
Yes. This helps improve account isolation.
Which proxy types are most commonly used with AEZAKMI?
For most scenarios, ISP and residential proxies are preferred because of their stability and higher trust levels.
Thanks for the tutorial. Clear screenshots and straightforward explanations make the setup process much easier to follow.