
How to Set Up a Proxy in ixBrowser: Step-by-Step Guide
ixBrowser allows users to create separate browser profiles with their own connection settings, browser fingerprints, and device parameters. This makes it easier to manage multiple accounts simultaneously and keep work environments isolated within a single browser.
To ensure each profile uses its own network connection, ixBrowser includes built-in proxy support. This allows you to assign unique IP addresses to different profiles and choose the appropriate geolocation for each session.
In this guide, we’ll walk through the process of configuring proxies in ixBrowser and explain the key settings required before launching a profile.
Why Use Proxies in ixBrowser
When working with multiple profiles, it’s important to manage not only browser settings but also network connectivity.
Proxies in ixBrowser help you:
- assign separate IP addresses to different profiles
- choose a specific country or region for your connection
- distribute tasks across multiple network routes
- reduce the likelihood of additional verification checks
- manage network settings independently for each profile
If you’re new to proxies, we recommend starting with this introductory guide:
Setting Up a Proxy in ixBrowser
Step 1. Create a New Profile
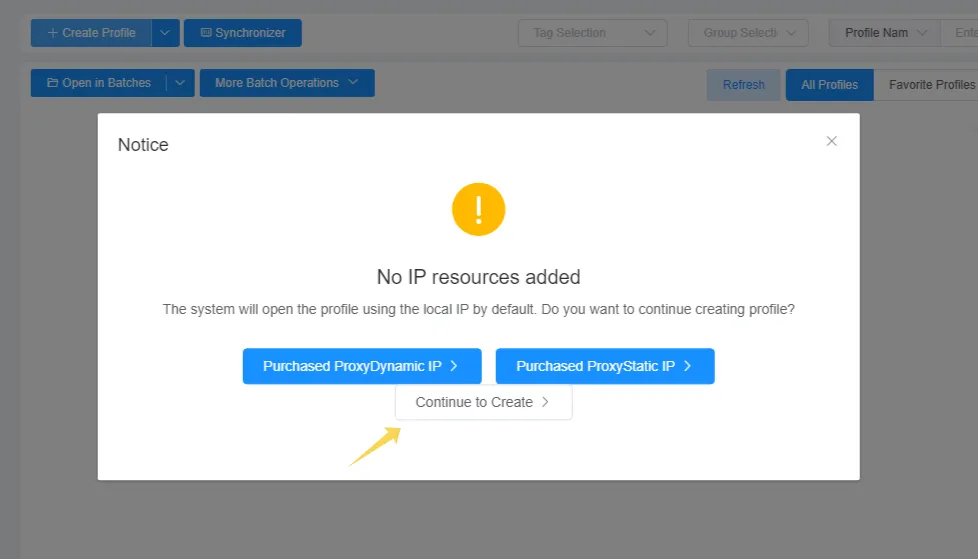
Open the Profile List section and click Create Profile.

A profile creation window will appear, where you can enter the profile name and other basic settings.
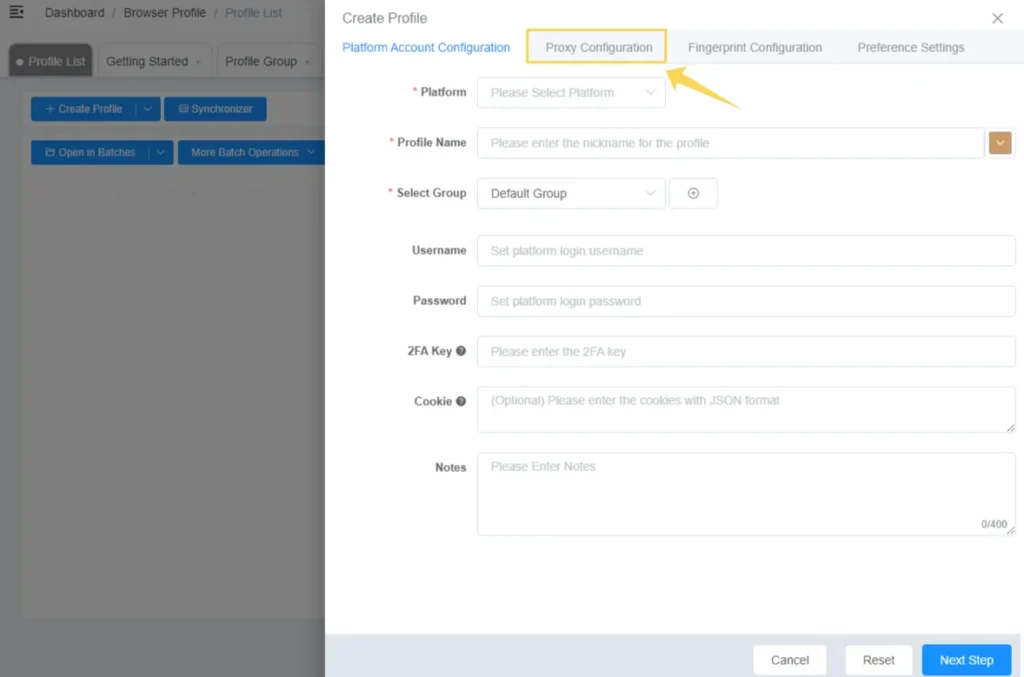
Next, switch to the Proxy Configuration tab.
Step 2. Choose a Connection Method
In the Proxy Configuration tab, select Custom under Proxy Method.
This option allows you to use third-party proxy servers and manually configure connection parameters.
Step 3. Select a Proxy Type
In the Proxy Type field, choose the desired protocol:
- HTTP
- HTTPS
- SOCKS5
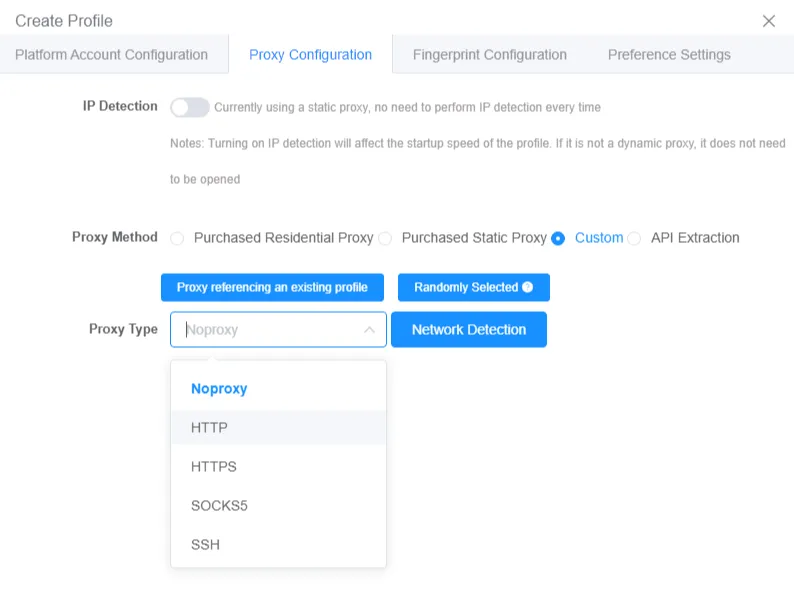
Once selected, the proxy configuration fields will become available.
Step 4. Enter Proxy Details
Enter the connection information provided in your Mango Proxy dashboard:
- Proxy Host
- Proxy Port
- Proxy Account
- Proxy Password
You can also select an IP verification service using the Proxy Detection menu.
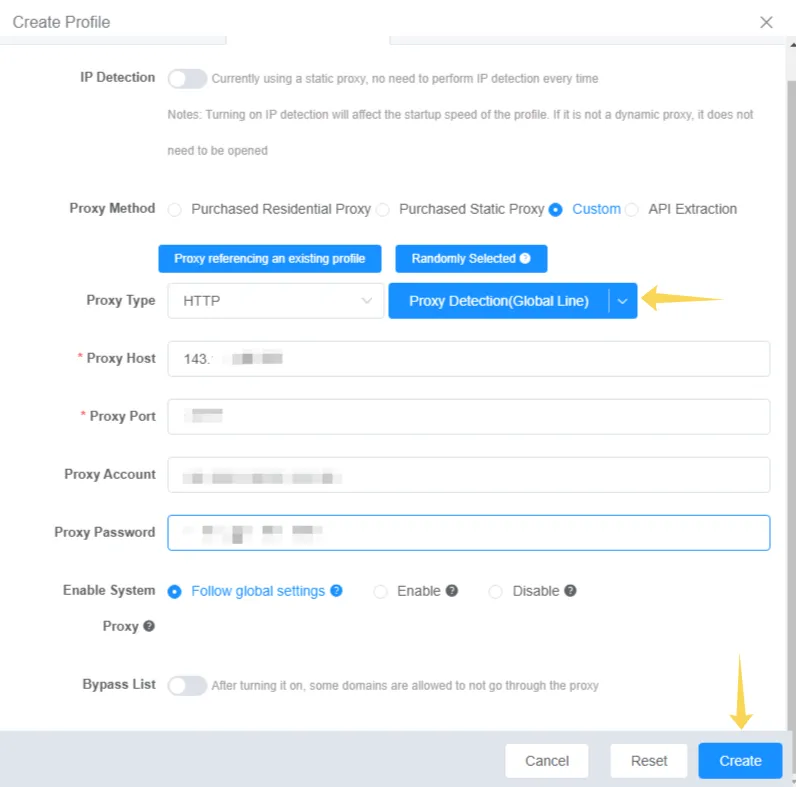
After entering all required details, click Create.
Step 5. Save and Launch the Profile
Once the profile has been created, it will appear in the Profile List section.
If everything is configured correctly, the assigned proxy server will be displayed next to the profile.
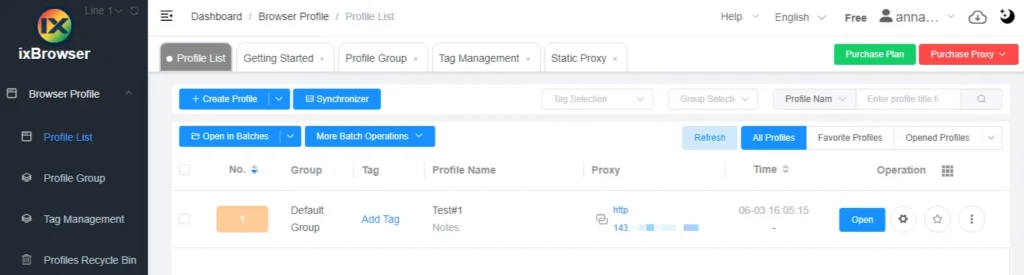
Click Open to launch the profile.
Verifying the Connection
After configuration, it’s recommended to verify that the connection is working properly and that the selected location is detected correctly.
You can use the following tools:
👉 Check your current IP address: IP Lookup
👉 Test proxy functionality: Proxy Checker
👉 View the connection route: IP Trace
Best Proxy Types for ixBrowser
| Use Case | Recommended Proxy Type |
| Social media management | Residential |
| Advertising accounts | ISP |
| Long-term account usage | ISP |
| Automation and scraping | Datacenter |
| Advanced anti-fraud platforms | Mobile |
If you’re selecting proxies for a specific task, we recommend reading:
👉 Residential vs Datacenter vs ISP Proxies: Key Differences
Common ixBrowser Use Cases
ixBrowser is frequently used for:
- managing multiple accounts
- working with advertising platforms
- affiliate marketing
- automation workflows
- marketplace management
- web project testing
You may also find these guides useful:
Common Issues
Unable to connect to the proxy
Verify that the IP address, port, username, and password are entered correctly.
Incorrect geolocation detected
Make sure the selected proxy belongs to the intended region.
Profile launches without a proxy
Check that Custom is selected in the proxy settings and that all connection details have been saved.
Websites load slowly
Try a different server or test another proxy type.
Best Practices
For more reliable operation, we recommend:
- assigning a dedicated proxy to each profile
- regularly checking IP availability
- avoiding mixing different regions within the same workflow
- testing proxy quality before launching tasks
- organizing active profiles into separate groups

Frequently asked questions
Here we answered the most frequently asked questions.
Which proxy types are most commonly used with ixBrowser?
For most tasks, residential and ISP proxies are preferred due to their balance of stability and trust among online platforms.
Can I use my own proxies?
Yes. Simply select Custom in the profile settings and enter your proxy details.
Does ixBrowser support rotating proxies?
Yes. ixBrowser can work with both static and rotating proxy connections.
Should each profile use a separate proxy?
Using a unique proxy for each profile is recommended for better profile separation.
Thanks for the tutorial. The step-by-step instructions helped me get everything configured without having to search through documentation.